Interactive Focal Drift Zone partitioning
In this method, FDZs are generated one at a time, and you are required to accept or reject a suggested FDZ before the software generates another (this is the ‘interactive’ part).
Interactive partitioning requires an active Partition Layer. To create such a layer you need to either right-click on the target object and select Create Partition Layer or create a new layer and then select its associated mandatory target object. For more information on Layers, see Layers.
To stop this process at any point, press the Esc key. You will be asked if you want to keep any FDZs you may have generated so far.
To use Interactive FDZ partitioning:
-
Click on
 or select
(or
type
autofdz_interactive).
or select
(or
type
autofdz_interactive).
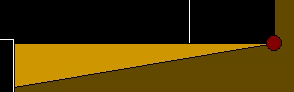
An initial Focal Target is indicated by a marker (a red circle) within the target object.
-
Click once on this marker.
The shape of a suggested FDZ is indicated by brown dotted lines. You can move these lines by moving your cursor, which will also move the original marker. If you want to override the suggested focal point, hold down the <Shift> key and click where you want the focal point to be.
Focal Points must not be placed on, or too near to, walls. To help avoid this happening, any current Snaps that you may have active are turned off until partitioning ends through completion, abandonment or error. At this point, any existing Snaps settings are resumed. Always place Focal Points at least 10cm (model-scale) from walls.
-
When you are happy with the shape and position of the suggested
FDZ, press
Enter.
The area of the suggested polygon is filled-in and the space it covers is no longer available for partitioning. The software uses the placed FDZ to suggest new candidate focal targets to help you place the next FDZ. These appear as red markers on the edges of the FDZ you have just placed.
- Click once on one of these new markers. A new FDZ is suggested and appears as a light brown shape.
-
Either press
Enter to accept the suggested FDZ, or type
n and press
Enter to reject it.
If you experience errors with gaps in partitioning or inaccurately placed FDZ borders, see Changing the algorithm to resolve errors with FDZs.
Repeat steps 4 and 5 until you have placed all possible FDZs. The ‘Auto FDZ Parameters’ dialog is displayed.
-
Enter a value (in metres) in the box labelled
Enter the distance to offset Focal Points from
corners. This distance represents the space that people generally
leave between themselves and an obstacle they are passing (0.5 metres is a
realistic distance).
If the demand on a model increases significantly (for example when different scenarios are tested), you may need to increase this offset value to ensure accurate simulation of people moving around corners and obstacles.
- Click OK to close the dialog box.